link parties

Showing posts with label how to make your own. Show all posts

Thursday, November 4, 2010

sock puppet fun!

super-hero-bolg

This is a really fun rainy day activity and you probably already have all the supplies you need. Get out your scraps of fabric, felt, yarn leftovers, sequence, buttons and any other fun accessories.

We used socks, felt, yarn, googly eyes, fabric, beads, chenille sticks and adhered with fabritac.

The cape for Super Hudson is just a piece of felt turned over a piece of yarn and glued down. The mask is a rectangle piece of felt with a piece of chenille stick wrapped around a googly eye.

The hair for both puppets was made in the same way. Tie a piece of yarn into a hoop. Then take pieces of yarn and tie them around that piece at whatever length you want them to be. You can always trim after you glue it down.

We thought of all kinds of ideas for the puppets we could make like: bugs, flowers, clowns, dogs, cats, dinosaurs. We even thought about making puppets to re-enact a story like Little Red Riding Hood or Goldilocks and the Three Bears. In the end, my children (being a typical boy-boy and little princess) chose to make a super hero and a princess, not surprisingly.

Monday, October 25, 2010

super hero party

Hudson Brayden Graham


These are the invites for my sons 3rd b-day party. They were the easiest I’ve made yet, and I think they are my favorites. I just laid out the invitation cover, saved it as a HiRes JPG photo size 4 x 6 and had them printed at Walgreens as photos for $0.19 a print. I then glued a black and white print of the invitation details on the back. How simple and inexpensive is that?

Now for the party:


Super Hudson showing off his super muscles in his bat cave

Super Hudson showing off his super muscles in his bat cave

Now for the fun part, the party.

Every super hero needs a cape and mask to hide their identity so I made one for each super hero.

The masks are a simple oval shape with slits for the eyes. I used a black satiny fabric for the front, fast2fuse for the middle and a gold velvety fabric for the backing. I used  stretchy black elastic for the strap. I just sewed around the outside of the mask and eyes to hold it together and keep the strap on. I don’t think they look great but the kids thought the masks were cool. It just shows me that my work doesn’t have to be perfect for the kids to have a good time.

The capes look cool. I sort of traced a cape that my son already had  for the basic shape. I folded the sides in and sewed all around the outside edge of the cape to make a hem. I used velcro on the top to hold the cape on. You could put stars or the initial of each child on the back.

The bat cave. I made this out in our back yard. We have a gazebo in the center of our yard, so I covered the entire thing with outdoor black fabric netting and a big tarp. My husband spray painted a huge bat on the front of the tarp. I hung a bat in the middle inside the bat cave and put the capes and masks in there. The cave was really low tech but with a little imagination, it was real! Hudson was bringing all the guests into his bat cave to “fly” with him. He was so cute.

The party. We started with the super hero training camp which was an obstacle course. Once the heroes completed their training the kids drove Hudson’s bat mobile to the bat cave to get their super hero gear (capes and masks) and their crime fighting tools. batman balls and spider man silly string “webs”.  The kids went through the bat cave tunnels to get to the villain poster targets.

I think I had almost as much fun planning this party as the kids had at the party.

Monday, October 18, 2010

Kids cowboy holster


My kids are going to be Woody and Jessie from toy story for Halloween this year so I'm making their costumes. I never knew I would have so much fun making a costume. The holster is so cool for a little boy that I made 2 extras for my nephews because I think they'll just have fun playing cowboys.

I did a search and found a blog that gives step by step instructions on how to make the holster. It took me a couple times to get the pattern right but once I did the others were so easy to make that I made 3 in one night.

here's the link to the blog I found that has the step by step instructions for making your own holster.

http://jameehomemaker.blogspot.com/2010/03/cowboy-days-and-gun-holster-tutorial.html

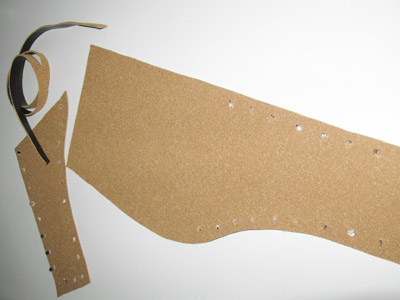
I used some faux leather remnants from a fabric store.  hole punched around the edge and cut thin strips of the same leather for the lace. Basically you have one piece that is cut around the gun with extra at the top to weave the belt through and a second piece that covers the gun. Then just lace them together and you have on rough and tough cowboy holster.