link parties

Showing posts with label family:related. Show all posts

Friday, August 3, 2012

camp crafts: God's Eye

We just got back from our annual family camping trip. It's always a good time playing at the river, hiking, roasting marshmallows story telling and crafting with the kids. This year Alivia taught a couple crafts: lanyards and God's Eyes. The God's Eye was a really fun camping craft because they got to search for sticks in the campground. Her little cousin Ella looks up to big cousin Alivia and they are so cute together.


Tuesday, June 26, 2012

alphabet cupcake toppers


Free downloadable PDF for an alphabet party

I used these as cupcake toppers by cutting out the circles with a circle punch and gluing to a toothpick.


alphabet cupcake topper

Wednesday, June 6, 2012

honest abe

Today my daughter did a biography report on Abraham Lincoln. She got a huge laugh out of the class when she walked up in the hat and beard. They all loved the really tall hat! The top hat project was inspired by Sue Astroth's book, Super-Simple Creative Costumes. I used fast2fuse heavyweight and black felt. I wanted to make sure that it fit Alivia's head perfectly so that it wouldn't fall off during her speech. I measured her head and found a paper plate that had just about the right circumference so I just trimmed a little off and it was perfect. The beard is stuffed fleece and tied around her head with embroidery thread. Alivia asked if she could be Abraham Lincoln for Halloween. 
Score . . . one costume down 2 to go.


Monday, May 21, 2012

family:outing solar eclipse


I went with my family to a quiet little beach cove out in Point Reyes called Chicken Ranch Beach


We had a lovely family BBQ. 
At home, we marinated chicken, prepared salad, cooked rice and sliced fruit. 
At the beach, there wasn't much to do. The rice was still warm, the chicken strips were defrosting and marinating in BBQ, Apricot jam and dijon mustard sauce. After my husband barbecued, I plated the warm half white, half brown rice with chicken strips hot off the BBQ and a mixed green salad combined with pomegranate infused cranberries and almonds topped with poppyseed dressing and sprinkled with Point Reyes Original Blue Cheese


A side note about the cheese: Besides it being a fantastic farmstead cheese, the cows are raised on our family's ranch so it's extra special to us. As for the salad, I just put all our ingredients for the salad in a bag, shook, then plated and we were all set for a fancy beach dinner.


The beach is sheltered so that it wasn't too windy and the kids were able to play in about ankle deep waves while dad bar-b-qued. This beach was also the perfect location for viewing the solar eclipse; the first annular eclipse since 1994. We look forward to seeing the "Ring of Fire" again in 2023. My daughter asked if we'd save our viewer but I think we'll probably make a new one.


We made the viewer at home and brought it with us. Everybody at the beach was interested to see the partial solar eclipse so it was fun to share with other people.


Simple Solar Eclipse Pin Hole Viewer


  • 2 card board sheets
  • duct tape
  • small square of foil
  • push pin
  • white paper
  1. cut 2 large sheets of cardboard
  2. tape a sheet of paper on one
  3. cut a square in the other cardboard
  4. tape tin foil over the square
  5. push pin through foil to make a pin hole
You now have a viewer.  It was simple to make and worked perfectly!


Monday, May 14, 2012

magical splatter paint butterflies

For mother's day I woke up to an amazing orchid display. My husband saw it and thought of me because of the hand-painted butterflies. Of course I looked at it and was amazed but then immediately thought of an art project that I did with my daughter's 3rd grade class. They were learning about Jackson Pollock and had the opportunity to try out splatter painting. It was really fun but wouldn't it be magical to decorate the classroom with butterflies cut out of their splatter paints. Maybe I'll suggest it for my son's class when he's in 3rd grade.


Thursday, May 10, 2012

my mustache

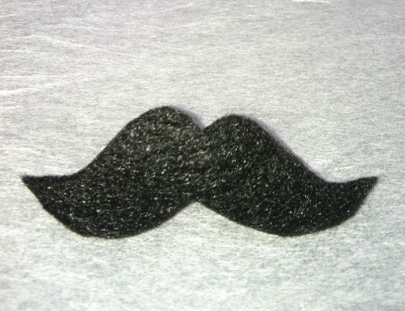
The girls LOVE the mustache.


I thought my young girl scouts might think it funny to have little mustache pins. So I made a little template for them to cut and make into a swaps. My daughter brought her mustache pins to a huge event celebrating 100 anniversary of girl scouts. She exchanged her mustache with an older girl who then calls all her friends over to see her new little friend. The big girl hugs my little girl and tells her I'll never forget you and takes a picture with her. I wish I had the picture because the story is so funny and my daughter was so proud that this big girl was so impressed with her. I do have a picture of the mustache though and I have a free little template for you. enjoy.


Thursday, May 3, 2012

Rainbow Unicorn Swap

Remembering back when I was 10, I loved unicorns and rainbows. So I designed a fun little unicorn with rainbow ribbons for my girl scout troop. The girls are going to a huge event to celebrate the 100th anniversary of girl scouts. All the girls will have cute little things that they made to trade with other girls called, "swaps". My troop will have the unicorns and a couple other swaps. The girls are so excited for this and can't wait to see what other girls made. 


For pattern go to craftsy


Friday, November 19, 2010

~kid~ lunch box notecards


Send a cute little foldable notecard to your child. Personalize with your own message on the inside. Just cut and fold these 7 different cute monster lunch box notecards. I think they're cute for boys or girls.  Each one has a cute little guy on the outside and is blank on the inside. Here's your FREE downloadable PDF. Enjoy!   notecards

featured on this linky party!

Monday, November 15, 2010

wedding card


Wedding card printed on front side and blank on the inside, available in 2 sizes.

  • small folds to about 2.5 x 3

  • large folds to about 3.75 x 4


Here is your free downloadable PDF wedding_card

Saturday, November 13, 2010

green your house cleaning products

My friend Zinnia gave me these recipes to green household cleaners. These are all natural so you don't have to worry about the kids helping out with the cleaning or the chemicals you're breathing while cleaning. Thanks Z, these are fantastic!

These simple, easy-to-find ingredients are all you need to make green cleaners:
Baking soda
• Borax (usually found near powdered laundry soap in supermarkets)
Castile soap (We use Dr. Bronner’s)
• Distilled white vinegar
Essential oils (we like to use orange, lemon, lavender, oregano, and bergamot)
• Purified/filtered water

All-Purpose Cleaner Spray


Replaces Formula 409 or the likes: Use for all surfaces, countertops, sinks, floors, etc.

RECIPE


• 2 Tbsp. castile soap
• 2 tsp. borax
• 3–5 drops each:
Lemon essential oil
Orange essential oil
• 5 oz. hot, filtered water
• 8 oz. distilled white vinegar

INSTRUCTIONS


1. Combine castile soap, borax, essential oils, and hot water in 32 oz. spray bottle Replace top and shake to mix contents.
2. Add vinegar and fill to 32 oz. line with hot filtered water. Replace top and shake again to mix ingredients.
3. Spray and wipe on counters/surfaces.

Glass & Degreaser Spray


Replaces Windex: Use to degrease all glass surfaces (mirrors, windows, microwave front) or to degrease sinks, countertops, cabinets, floors, and so on. (It’s perfect for removing mineral deposits and soap residue on sinks, too!)

RECIPE


• 8 oz. distilled white vinegar
• 24 oz. filtered water

INSTRUCTIONS


1. Combine all ingredients in 32 oz. spray bottle.
2. Replace top and shake to mix contents. Spray and wipe dry.

Bathroom & Disinfectant Spray


Replaces Lysol: for all surfaces in need of disinfection (toilet surfaces, door handles, bathroom sink, etc.). Kills bacteria, viruses, fungi. Use on toilet/surfaces to disinfect and kill germs. Note: For disinfection, spray needs to sit on surface for 5–10 min.

RECIPE


• 1 tsp. castile soap
• 10–12 drops each:
Oregano essential oil
Lemon essential oil
• 5 oz. hot, filtered water
• 27 oz. distilled white vinegar

INSTRUCTIONS


1. Combine soap, both essential oils, and hot water in a 32 oz. spray bottle. Replace top and shake to combine contents.
2. Add vinegar, filling to 32 oz. line. Replace top and shake to mix contents.
3. Spray on surface to disinfect, let sit 5–10 minutes, then wipe dry.

Sink Scrub/Drain Opener/Toilet Bowl Cleanser


Replaces Comet and Drano: Green ingredients like vinegar and baking soda even work in a super-cleansing capacity!

Drain Opener


RECIPE


• 4 Tbsp. baking soda
• 8 oz. hot water
• 4 oz. distilled white vinegar

INSTRUCTIONS


1. Combine baking soda and hot water in an 8 oz. cup and pour into drain.
2. Pour white vinegar into drain, and cover. Let sit 30 min. and rinse with hot water.

Toilet Bowl Cleaner


RECIPE


• 1 cup baking soda
• 8 oz. distilled white vinegar

INSTRUCTIONS


1. Combine ingredients in toilet bowl.
2. Scrub and let sit 30 min. or overnight.
3. Flush toilet to rinse.
4. To finish, spray toilet bowl with Bathroom & Disinfectant Spray and let dry.

Sink Scrub


RECIPE


• Baking soda
• Distilled white vinegar

INSTRUCTIONS


1. Sprinkle both ingredients into the sink and mix into a paste.
2. Scrub and rinse. For tough stains, let sit 30 min. before rinsing.

Air Freshener


Replaces chemical-based air fresheners like Febreeze: Essential oils and filtered water are all you need to keep things smelling fresh. (And at C&T Publishing, where everybody shares just 2 bathrooms, this is important!)

RECIPE


• 3–5 drops each:
Orange essential oil
Lemon essential oil
Bergamot or lavender essential oil
Castile soap
• 12 oz. filtered water

INSTRUCTIONS


1. Combine all ingredients with half of the water in a 12 oz. spray bottle. Replace top and shake to mix contents.
2. Fill to top with remaining filtered water. Spray as needed.

Tuesday, November 9, 2010

Make a wish and save your chicken bones


I saw this table setting idea on Martha Stewart and I love it! Start roasting chickens and saving the wishbones. Our family has always done the wishing bone game but never with such pretty and magical looking bones.

Wishbone Napkin Ring


To make "silver" napkin rings, save wishbones from roast chickens, wash and dry them thoroughly, and spray them with chrome paint. On each one, string silver cord from tip to tip; wrap it six times around the bone, and tie it off.

Monday, November 8, 2010

lunch box thank you notes


This month I am making a special effort to write a little note to my kids each day letting them know what I am thankful for and how special they are.

Here is a FREE downloadable PDF of  blank fall note cards to be used for whatever you like.

fallcards

Friday, November 5, 2010

accordion book craft


Sitting on my desk is a READY-TO-GO accordion book.

Last year I purchased 25 Accordion Blank Board Books, as a donation to my daughter’s preschool classroom. I gave them to the teacher and asked “Do you think you could use these for something?”

I didn’t give her any suggestions on what she could possibly do, just to see what she might come up with. I was surprised, along with the rest of the parents, at the end of the year “graduation” with a gift from the teachers, an accordion photo album, highlighting big events throughout the school year. There are photos of Livi with Santa, at the pumpkin patch, a class photo of all the children in their Halloween costumes, the fire station field trip (a photo of Livi and a firefighter spraying the fire hose, priceless), the St. Jude’s Trike-a-Thon, and they even had the kids do handprint turkeys. It is such a nice remembrance of my daughter Livi’s preschool year.

The best part of it was something that was completely unplanned by the teachers. When you fold the accordion in, you can see at the same time a photo of your child from the first day of school along side of a photo of your child at the end of the year, both photos include your child’s height. Almost every child grew 2 inches and they all transformed from toddlers at the beginning of the year, into young children ready for kindergarten at the end of the year. It is so amazing to see this change in a single school year!

Thursday, November 4, 2010

sock puppet fun!

super-hero-bolg

This is a really fun rainy day activity and you probably already have all the supplies you need. Get out your scraps of fabric, felt, yarn leftovers, sequence, buttons and any other fun accessories.

We used socks, felt, yarn, googly eyes, fabric, beads, chenille sticks and adhered with fabritac.

The cape for Super Hudson is just a piece of felt turned over a piece of yarn and glued down. The mask is a rectangle piece of felt with a piece of chenille stick wrapped around a googly eye.

The hair for both puppets was made in the same way. Tie a piece of yarn into a hoop. Then take pieces of yarn and tie them around that piece at whatever length you want them to be. You can always trim after you glue it down.

We thought of all kinds of ideas for the puppets we could make like: bugs, flowers, clowns, dogs, cats, dinosaurs. We even thought about making puppets to re-enact a story like Little Red Riding Hood or Goldilocks and the Three Bears. In the end, my children (being a typical boy-boy and little princess) chose to make a super hero and a princess, not surprisingly.

Wednesday, November 3, 2010

Personal Library Bookplates


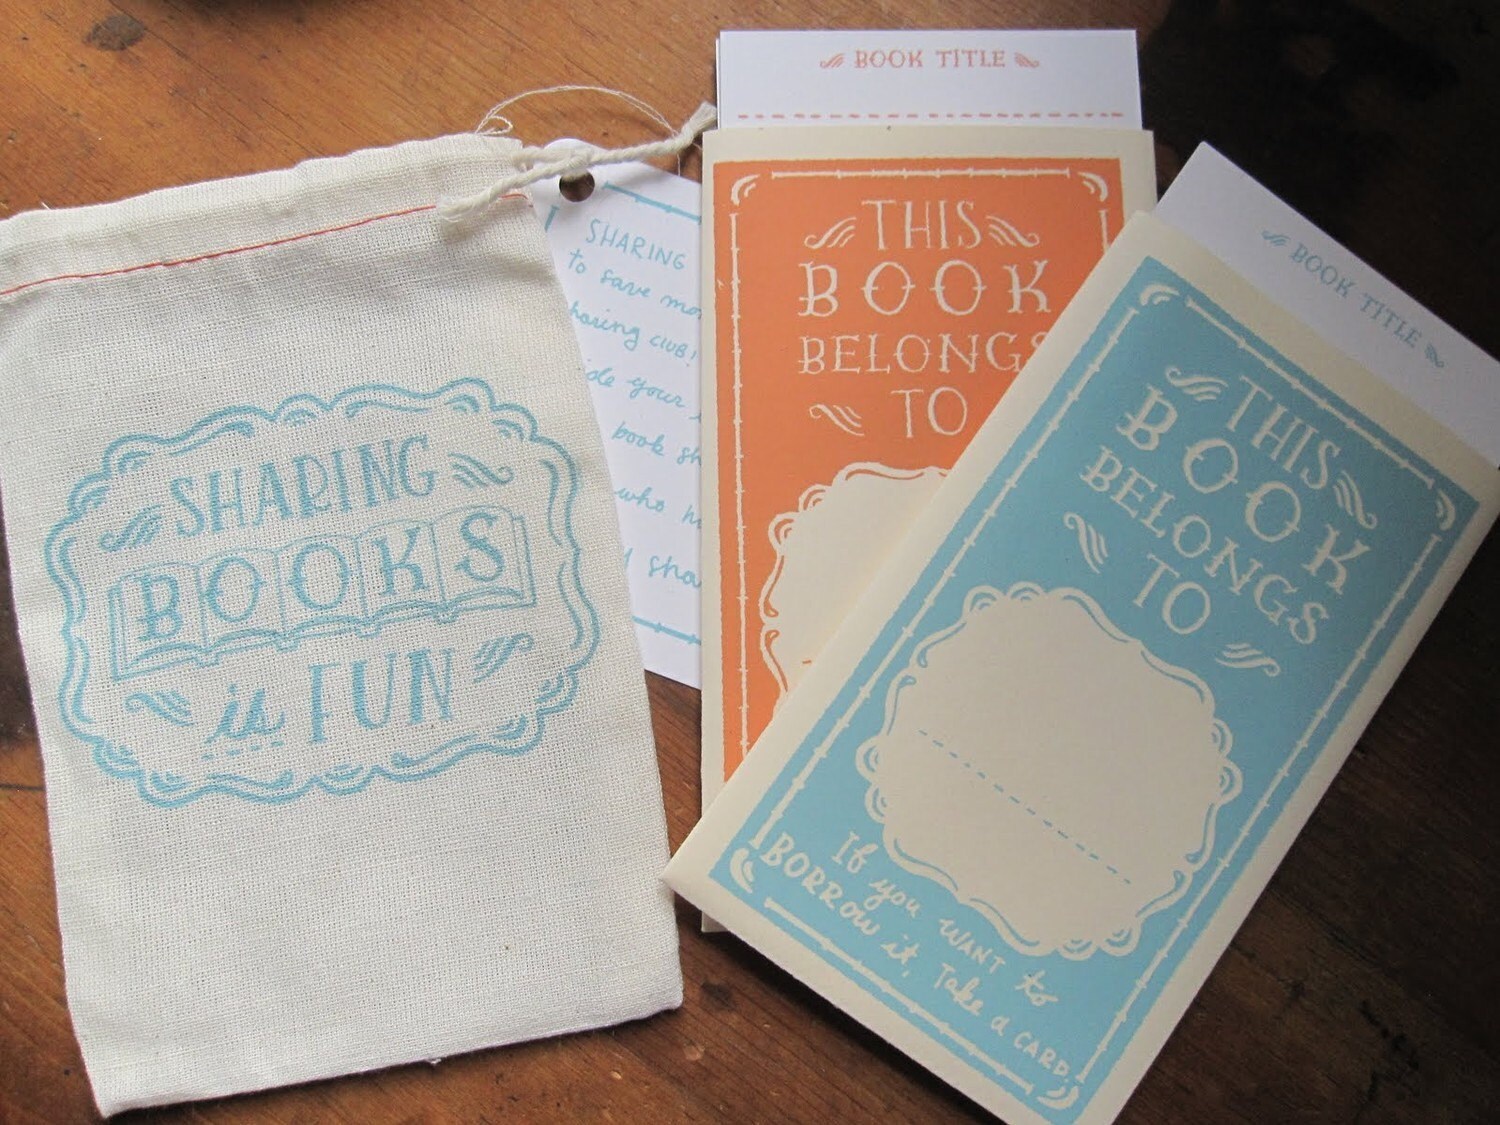
{Etsy find} I think this is a great idea and they are so pretty!

Personal Library Bookplates


Personal Library Bookplates

zoom


Personal Library BookplatesPersonal Library BookplatesPersonal Library Bookplates


Sharing books is a great way to save money and start a book sharing club! Now you can keep track of who has what book with your own personal library bookplate. Affix the bookplate inside your book and keep the card in the book sharing bag to keep track of who has what books. 

Each personal library bookplate is a complete set of 1 hand printed linen bag, 3 hand printed bookplates and 6 library cards.

Book Sharing Linen bag - 3.75" w x 5.75"h
Bookplate - 3.25"w x 5.325"h

Happy Book Sharing!

I am happy to combine shipping with other purchases.

Please note that colors may slightly vary depending on your monitor's color and contrast settings.

Thanks for looking!

Mary Kate

© 2010 Mary Kate McDevitt


Monday, November 1, 2010

Eco-friendly tip for a longer lasting carved pumpkin


-greenTIP-

  • soak carved pumpkin in a 50/50 solution of borax and water then dry thoroughly

  • Everyday spray a little borax solution in pumpkin and around the carved area


-greenTIP-

  • Don't throw away the seeds, place them in a bird feeder, or leave them out for the squirrels

  • We roast and salt our seeds (yummy)

  • Also, Compost your pumpkin after halloween

fresh cut flowers


-TIP- I just heard a great tip for your fresh cut flowers. Most of us have heard to cut off the ends of the stems at an angle . . . also do this under running water. The idea is that the first breath that the flowers should take is water not air.

Saturday, October 30, 2010

Reach For The Sky Woody and Jesse


YAY! I completed the kids costumes. Woody and Jesse turned out to be pretty easy to make. A pair of jeans, a couple thrift store finds, and some fabric. I just loosly stitched the faux cow hide to a vest for Woody and a pair of jeans for Jesse. For Jesse’s shirt, I fabri-tacked the cording and the satin ribbon for the sleeves. The kids are so happy with their costumes that mom made.

See my previous post for the holsters.

Thursday, October 28, 2010

Halloween Goodie Tubes


These are awesome! I found the tutorial here: the muddy princess

The Town Hall Halloween Ball


They're bob, bob, bobbing for apples

They're sip, sip sippin' on cider

They're pop, pop, poppin' their popcorn

and they're packin' in the  puuunkin pie (say with lots of attitude)

at the town hall Halloween ball

I found some links to unusual pumpkin pie recipes

Recipe: Pumpkin Praline Pie

Recipe: Pumpkin Pie Dip

Gluten-Free Pumpkin Pie

recipe: Pumpkin whoopie pie

recipe:pumpkin pie drop cookies

-Tip- Roasting Pumpkins for Pie

Start by washing the pie pumpkin (a great variety for pies is Baby Pam) and then break off the stem and hack it in half.  Then scoop out the seeds.  Fill a 13×9″ pan with 1/4″ water.  Place pumpkins skin side up and roast at 400 degrees until very tender… This usually takes about 45 minutes to an hour.

Scoop the soft flesh from the skins and puree in a food processor with desired spices.  Use in the same porportions for pie as with a canned recipe.

Taste the difference!