link parties

Showing posts with label crafts for kids. Show all posts

Friday, August 3, 2012

camp crafts: God's Eye

We just got back from our annual family camping trip. It's always a good time playing at the river, hiking, roasting marshmallows story telling and crafting with the kids. This year Alivia taught a couple crafts: lanyards and God's Eyes. The God's Eye was a really fun camping craft because they got to search for sticks in the campground. Her little cousin Ella looks up to big cousin Alivia and they are so cute together.


Tuesday, June 26, 2012

alphabet cupcake toppers


Free downloadable PDF for an alphabet party

I used these as cupcake toppers by cutting out the circles with a circle punch and gluing to a toothpick.


alphabet cupcake topper

Wednesday, June 6, 2012

honest abe

Today my daughter did a biography report on Abraham Lincoln. She got a huge laugh out of the class when she walked up in the hat and beard. They all loved the really tall hat! The top hat project was inspired by Sue Astroth's book, Super-Simple Creative Costumes. I used fast2fuse heavyweight and black felt. I wanted to make sure that it fit Alivia's head perfectly so that it wouldn't fall off during her speech. I measured her head and found a paper plate that had just about the right circumference so I just trimmed a little off and it was perfect. The beard is stuffed fleece and tied around her head with embroidery thread. Alivia asked if she could be Abraham Lincoln for Halloween. 
Score . . . one costume down 2 to go.


Thursday, May 10, 2012

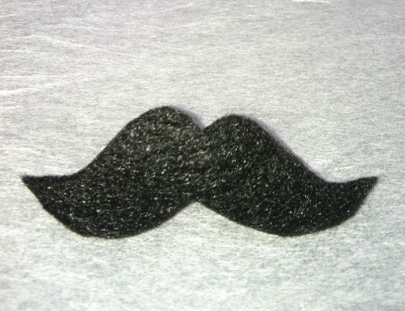
my mustache

The girls LOVE the mustache.


I thought my young girl scouts might think it funny to have little mustache pins. So I made a little template for them to cut and make into a swaps. My daughter brought her mustache pins to a huge event celebrating 100 anniversary of girl scouts. She exchanged her mustache with an older girl who then calls all her friends over to see her new little friend. The big girl hugs my little girl and tells her I'll never forget you and takes a picture with her. I wish I had the picture because the story is so funny and my daughter was so proud that this big girl was so impressed with her. I do have a picture of the mustache though and I have a free little template for you. enjoy.


Tuesday, October 26, 2010

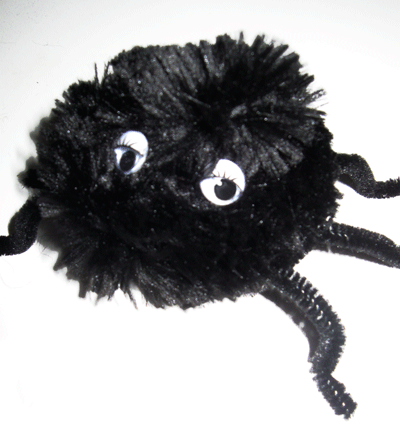
spider craft for kids


Supplies needed:

  • egg carton

  • scissors

  • glue

  • big fat black chenille stick for body

  • regular size black chenille sticks

  • black paint and sponge brush

  • red felt

  • googly eyes

  • something like a poker from your pumpkin carving kit to make holes


  1. cut egg carton into individual cups

  2. poke 3 holes on each side for legs

  3. paint black

  4. cut red fabric into a small diamond shape and glue on inside of carton

  5. cut regular size chenille sticks into about 4 equal pieces for legs

  6. cut big chenille stick into about a 2-3 inch piece to wrap around the egg carton

  7. glue big chenille stick down

  8. insert legs into holes

  9. glue on googly eyes


you're done!

Kit it! and give as a Halloween treat!


This post is featured in:


Friday, October 22, 2010

Scrappy Pumpkin Tee Shirt project

My friend designed this project for her daughter's girl scout troupe. I think it is such a great project.


• TAP® Transfer Artist Paper
• Plain tee shirt – white or light color
• Scraps of pretty patterned papers
• Black marker, pencil
• White paper, white card stock
• Glue stick, scissors, Exacto® blade
• All-in-one inkjet printer/copier
• Firm ironing surface and iron

  1. Use a black marker to draw a thick outline of a pumpkin with 4 segments on white cardstock

  2. Copy the pumpkin on to white paper to make a master copy

  3. Use an Exacto blade to trim out the inside of each section of the pumpkin on cardstock to create a stencil

  4. Use the stencil to mark and cut out scrap papers to fit inside each section – use a different patterned paper for each section to make it scrappy, and don’t forget the stem!

  5. Glue each of your trimmed scraps onto your master copy

  6. Load a sheet of TAP into your inkjet printer and copy your scrappy pumpkin on to the TAP, following package instructions

  7. Trim your pumpkin out of the TAP sheet and place it image-side-down on to your tee shirt

  8. Press the image on to your shirt with your iron, following the TAP package instructions

  9. If desired, you can also print out some Halloween words on to TAP to go with your pumpkin – just be sure to reverse the words on your computer before printing them out


This post was originally posted on C&T Publishing's blog:

http://www.ctpubblog.com/2010/10/08/scrappy-pumpkin-tee-shirt/